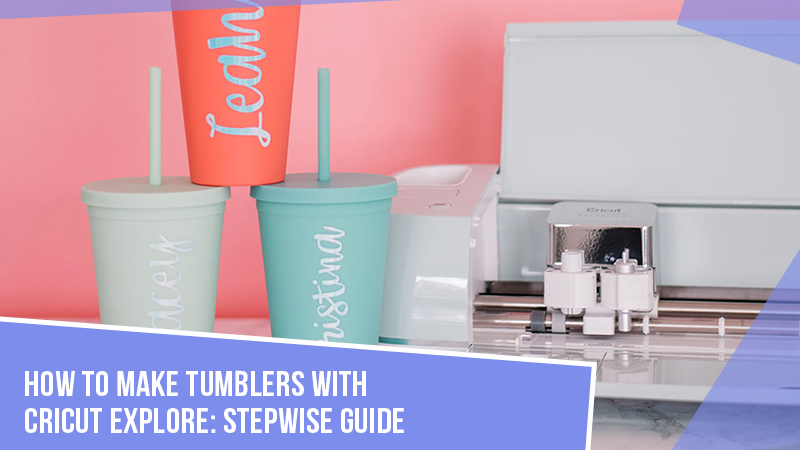
Hey crafters! It’s time to cover some of the stunning crafts that you can make with your powerful Cricut Explore machine. If you’re wondering how to make tumblers with Cricut Explore – don’t worry; I am here to explain how to do it the right way. Well, tumblers are the simplest thing to design with your Cricut machine, but still, you should know the right technique to create them. Hence, if you are looking for a guide for this, here is your ultimate guide.
Level up your crafting skills and make something beautiful to give to your loved ones. However, to learn it, you will have to stick to my guide to get started creating a tumbler with Cricut.
Materials and Accessories You Will Need for a Cricut Tumbler
As you know, you need a set of materials and accessories to make your personalized tumblers or any crafts. Look at the list.
- Cricut premium vinyl ( I’m taking black color; you can take any color of your choice)
- Weeding tool
- Scraper tool
- Scissors
- Transfer tape
- Cricut machine
- Rubbing alcohol
- Cotton pad
With all these items, you can start making your personalized tumbler with the Cricut Explore machine. Now, look at the steps to learn how to make tumblers with Cricut.
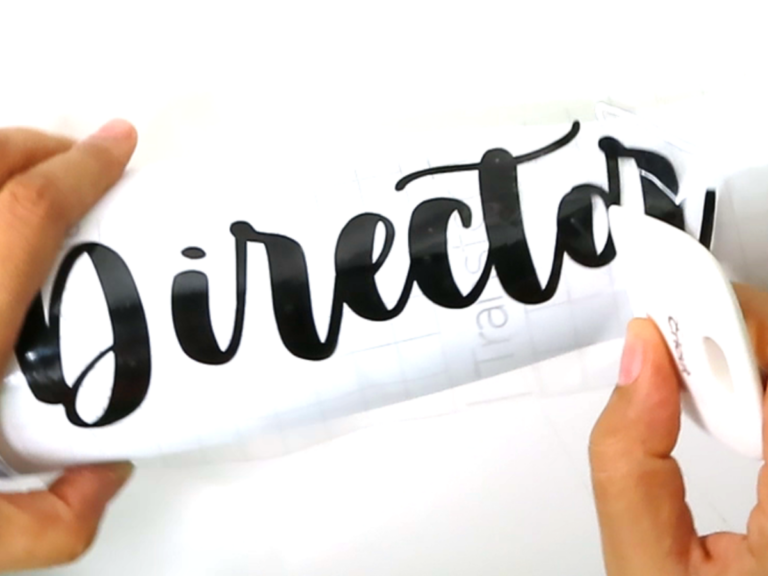
Step 1: Write a Word or Name on Design Space
This is the very first step in creating a tumbler. Open Design Space on your PC and hit the “New Project” button. Then, click on the text word and then type any name that you want to use on your personalized cup. I am using the word “Director.” You can adjust the size of your words and add as much detailing as you want.
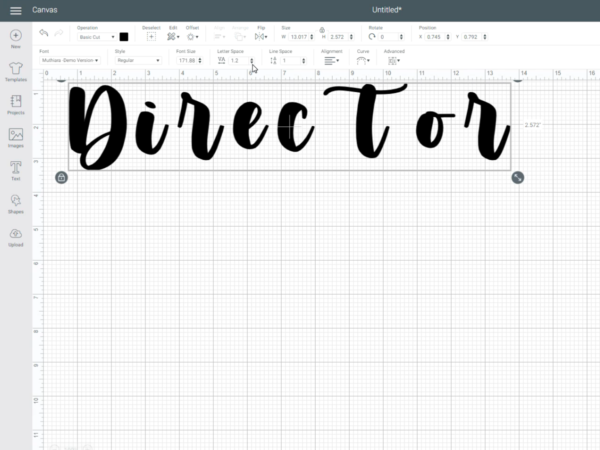
Select your preferred font from Cricut Design Space. However, if you don’t get any font of your choice, you can even take them from different sources like dafont.com and muthiara. You will get the fonts completely free on them.
Adjust your words by lowering their spacing and stopping when they start to overlap each other. Next, hit the “Ungroup” option to separate each letter. Now, you can slide each letter. After that, select your full word and right click on your word, and hit the “Weld” button.
Then, your Cricut machine will cut the whole word in one piece. I am adjusting my word with 10 inches height and 8 inches width; you can select the size of your tumbler to make the design fit on it. At last, hit the “Make It” button and ensure that you are choosing the right material. Well, you don’t need to mirror the design.
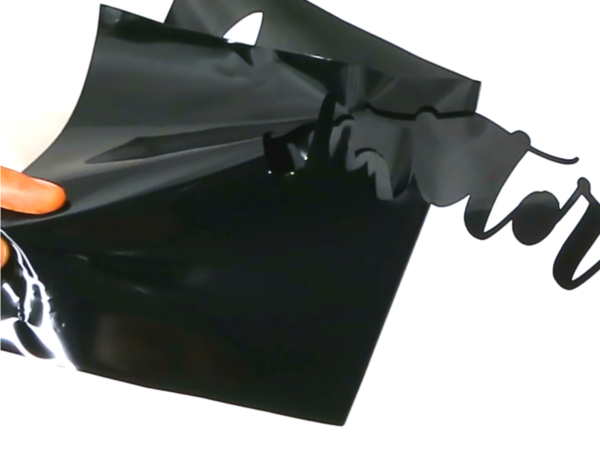
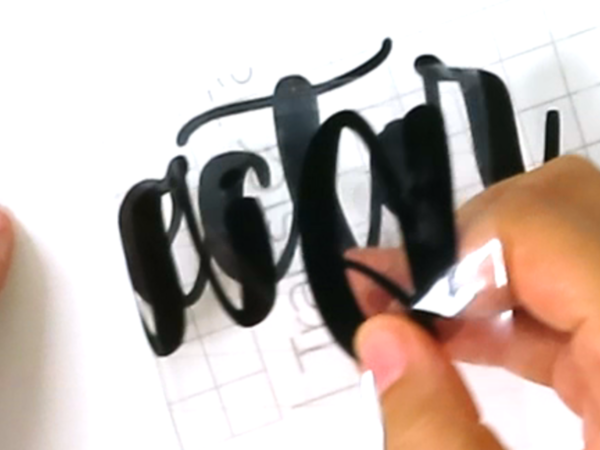
Step 2: Cut the Name or Word Out
Finally, you are going to get your black premium vinyl and adjust the pressure to “More.” Now, move back to your cutting machine and hit the “Go” button. After that, the machine will start cutting your word. Next, press the “Unload” option to take off your cutting mat. Then, use a weeding tool to remove the excess vinyl carefully.
Step 3: Stick Your Vinyl to Tumbler
First, take your transfer tape and cut a 4 inches tall transfer tape. Afterward, you need to cut a transfer tape piece to cover your word. Now, peel off the backing from the transfer tape and stick the tape on the vinyl word to complete the process of how to make tumblers with Cricut.
Ensure your transfer tape adheres to the vinyl word. Also, you can use the brayer tool and scraper tool to make it sit in its place. Then, you can use rubbing alcohol and a cotton pad in order to clean the tumbler where you want to fix your design.
Next, peel off the backing of your transfer tape. If the tape doesn’t stick to the tumbler correctly, use the rubbing alcohol and then apply the vinyl again. Once your tumbler is dried, adjust the vinyl words exactly where you want it placed. Now, ensure that the words are straight. Then, start pushing your word a little down from the center. Also, you can use a scraper tool for rubbing the tape on your tumbler.
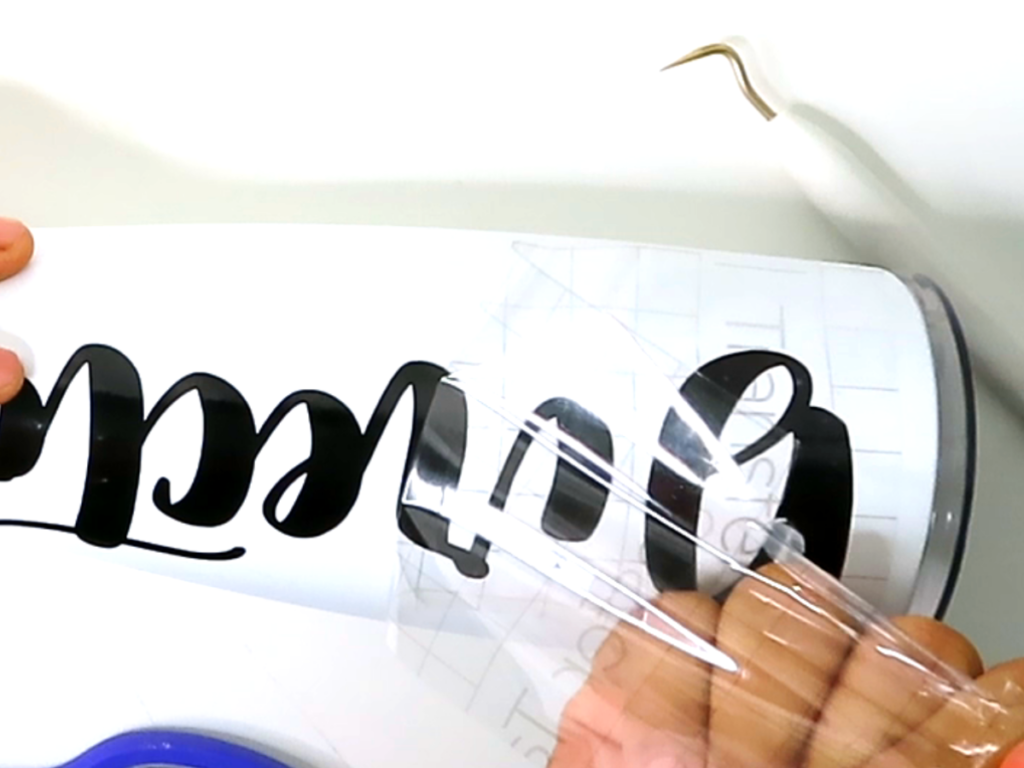
Finally, peel off the transfer tape away from your vinyl at 45 degrees. Then, the vinyl starts to adhere to the transfer tape and rub the vinyl on your tumbler with the scraper tool. That’s how you can make a personalized tumbler with your Cricut Explore machine.
Conclusion
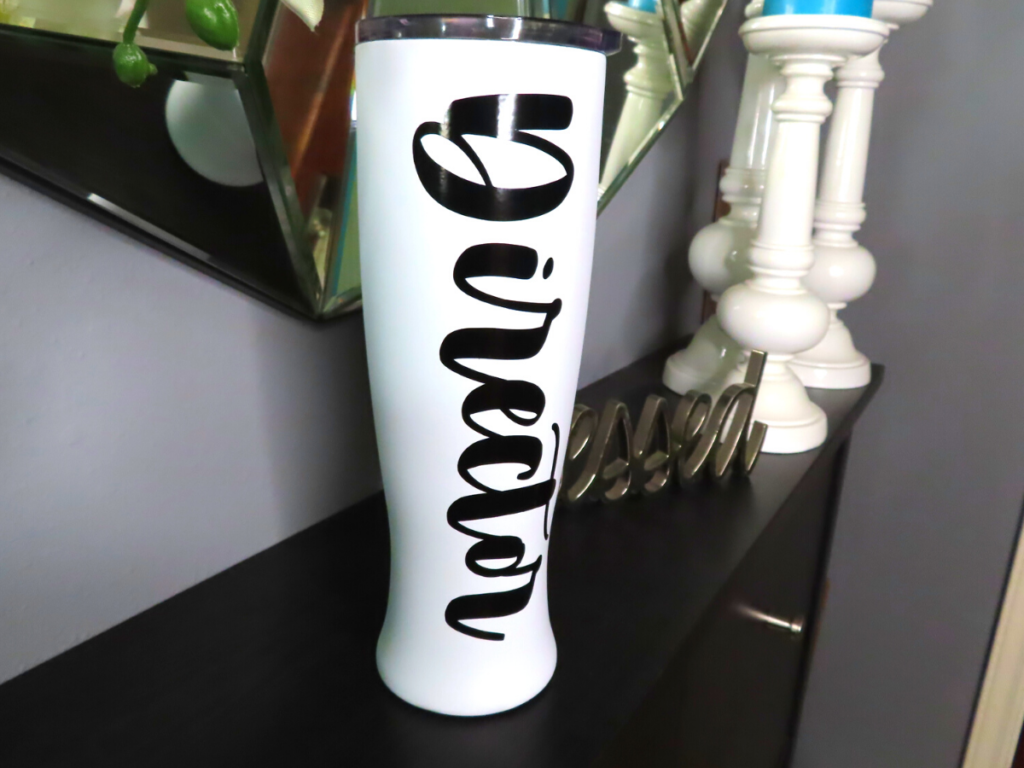
So, you have seen how to make tumblers with Cricut. It’s pretty easy to make custom tumblers with a Cricut Explore machine, and even beginners can create them easily. All you need is a set of necessary materials to get started with your machine, including black vinyl, transfer tape, scraper tool, scissors, and a beautiful tumbler. Design Space is your companion in this project. You can use fonts and designs from the Design Space library and start cutting them from your machine. Apply your design carefully on the tumbler and surprise someone with this cute craft.
FAQs
How to Make Tumblers With Cricut?
Making tumblers with Cricut is effortless with the Cricut features and materials. Gather all the necessary materials for this craft project and select a text or design from the Cricut Design Space. Then, cut your design with the Cricut Explore machine, peel off the backing paper of your vinyl, and apply it on a transfer paper. Now, put the transfer paper on the tumbler, scrape the design onto the tumbler, and then peel it back from the tumbler.
What Are the Materials Used on a Cricut Tumbler?
There are many materials you need to make a Cricut tumbler, including a StandardGrip mat, weeding tool, transfer tape, tumbler, permanent vinyl scissors, etc. With all these materials, you can create the best-looking tumbler with any Cricut machine and Cricut Heat Press. Apply the design using your Cricut Heat Press using the required temperature and pressure.
What Type of Vinyl Should I Use to Create Tumblers?
A permanent adhesive vinyl is best suited for making vinyl tumblers. As tumblers are washed frequently and need to be carried outside, the removable vinyl may get washed off or faded. Therefore, you need a permanent vinyl solution to make customized tumblers. So, when you wash your tumbler, the vinyl won’t move.
Read more: cricut.com/setup mac

No comments yet