Now, sublimating thin glass has become easier with a Cricut Mug Press. You can also learn how to use Cricut Mug Press for tumblers. In the beginning, I didn’t even know how to use my Mug Press machine to create a tumbler, so I thought about giving it a try. My attempt was really successful the first time. During this process, I learned effective methods that I will share in this blog.
I understand that it might be intimidating for many crafters, so I found an effective solution that works for all types of thin tumblers. In this tutorial, I made a 20-ounce tumbler using my Cricut Mug Press. Besides these, I will also tell you how to set up this machine. After that, we will learn the step-by-step instructions for making custom tumblers.
So, read the blog till the end and follow each and every instruction to avoid any common mistakes. Visit this blog to learn more!
How to Setup Cricut Mug Press on Your Device?
You can’t learn how to use Cricut Mug Press for tumblers until you set up your Mug Press. So, let’s start setting it up first. Here are the steps to set up a Mug Press:
- First of all, you have to go to the browser and search for Cricut Design Space on your computer.
- After that, install the Cricut app and launch it.
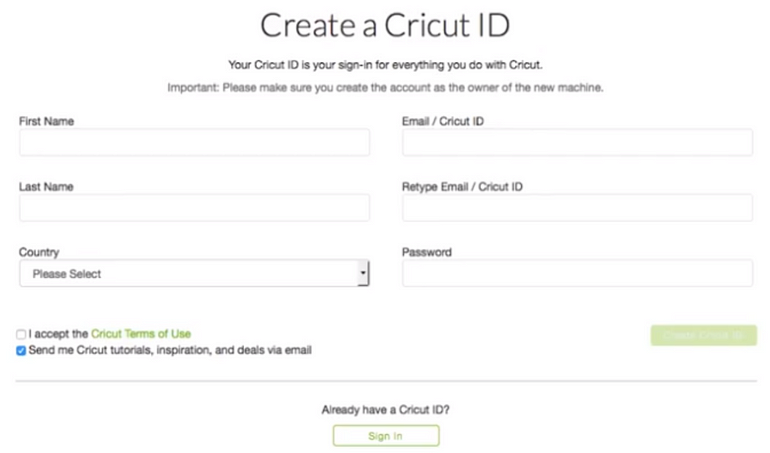
- After launching, you need to create your Cricut ID if you haven’t created it yet.

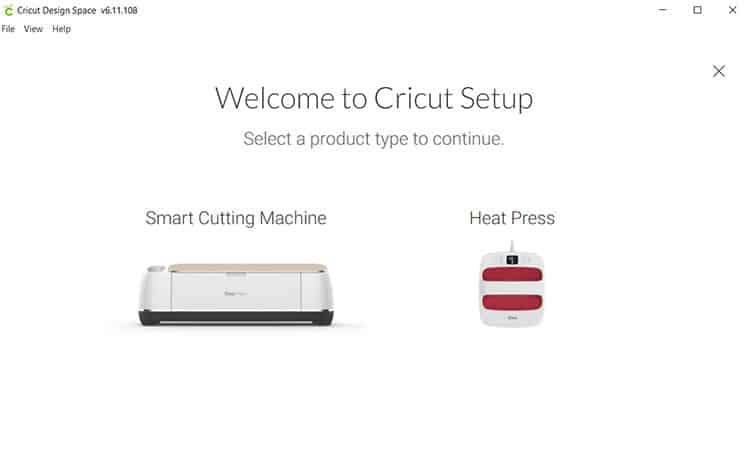
- On the next screen, you will see the Welcome to Cricut Setup page.

- Next, you will need to select the Heat Press and then Cricut Mug Press.
- Now, follow the screen prompts to connect your Mug Press, confirm the firmware, and complete the activation process.
Supplies Required for Cricut Tumblers
You will need the following items to make tumblers on Mug Press:
- Artesprix Protective Paper
- Heat Resistant Mat
- Cricut Mug Press
- Sublimation printer
- Sublimation ink
- Heat resistant gloves
- Sublimation paper
- Infusible Ink
- Lint Roller
- PYD Life Inserts
- Heat Resistant Tape
- Tape dispenser
Despite this, you will also need sublimation blanks, as I am using 20 oz skinny tumblers. Now we have gathered the supplies, let’s learn how to use Cricut Mug Press for tumblers. All the easy instructions will make it easier for beginners to sublimate their tumbler hassle-free.
How to Make Tumblers With Cricut Mug Press?
Here, I am going to teach you to make a tumbler with Cricut. Fortunately, my first try went really well without any mistakes. So, let’s see how you can sublimate the tumbler.
Since we are using skinny tumblers, it might not fit well inside the Mug Press. Hence, we need to use PYD life inserts for heat conductive inserts.
It comes in various sizes that are suitable for different blanks. So, the purpose of using these PYD Life inserts is that they can expand the size you press to fit in the Mug Press. Before placing the blanks inside the mug, make sure there are no plastic pieces or straws inside the tumbles, as they can melt. Also, clean the tumbler using the lint roller to remove the dirt and debris.
Besides, I use the protective paper on the outside to protect my heat press. You can also use the tape to secure the paper into its place.
Finally, the tumbler is ready to be pressed in the Mug Press. Now, you need to wrap these inserts around the tumblers, as shown in the picture below.
Tumblers are usually long in shape, so you need to flip it upside down and repeat the same process twice.
Here’s the final result! That’s all in this tutorial. Now, you might have understood how to use Cricut Mug Press for tumblers to make your own tumblers.
FAQs
Question 1: Can you use Cricut Mug Press for any mug?
Answer: Cricut Mug Press can sublimate only those mugs that are labeled as sublimation compatible. They are actually compatible with infusible ink. However, if you are using non-Cricut mugs blank, then I can’t say about the results. Hence, you should always use poly-coated, sublimation-coated products that are suitable for your requirements.
Question 2: Can I use a Cricut Mug Press for my glass cups?
Answer: Yes, you can use frosted glass cups or mugs. In other words, you will need a glass sublimation blank that can easily transfer your design onto it. A normal glass may break while pressing it into the Mug Press. So, make sure you are using the right glass mug, such as a frosted glass cup.
Question 3: How long does it take to sublimate a tumbler in Cricut Mug Press?
Answer: The duration for sublimating the tumbler is about 4 minutes. To sublimate it, however, you will need to wrap butcher paper all around the tumbler and then use tape to secure it. After that, you can put your tumbler into the Mug Press and let it transfer your cut vinyl design to the tumbler.
Final Words
In this blog, I explained how to use Cricut Mug Press for tumblers with an easy example. In size, tumblers vary, hence you need to sublimate them accordingly. For skinny tumblers, you can use the insert sheets to adjust the thickness so that your Mug Press can transfer the design. Despite these, you will need to set up your Mug Press by downloading the Design Space. Also, there are many supplies required to do this project. Ensure you have essential items with you.
Read more: cricut.com/setup mac

No comments yet