If you’ve ever wondered how to make your voice-over recordings sound totally pro, you’ve come to the right place. This blog post is all about the “Secrets of the Sound Booth” and we’ve got five killer insider tips that will level up your voice over recordings game.
Now, you might be wondering, why are high-quality voice-over recordings so important? Well, my friend, the answer is simple: they can make or break your project. Whether you’re narrating an audiobook, creating a commercial, or breathing life into animated characters, the quality of your voice-over performance can leave a lasting impression on your audience.
Imagine listening to a voice-over that sounds muffled, lacks energy, or is plagued by background noise. It’s like trying to enjoy your favorite movie with a scratchy, distorted soundtrack — pretty frustrating, right? On the other hand, when you hear a professional-quality voice-over, it’s like a symphony of perfectly timed notes that effortlessly convey emotions and engage your senses.
That’s exactly what we’re here to help you achieve. Our goal is to equip you with the knowledge, techniques, and insider tips that will transform your voice-over recordings into masterpieces. In the next sections, we’ll explore five essential tips that will revolutionize the way you approach voice over recordings.
So, let’s jump right into the first tip and discover how finding your unique voice can set you apart in the competitive world of voice overs.
Tip 1: Find Your Unique Voice
Alright, my aspiring voice-over maestros, it’s time to dig deep and find that voice that sets you apart from the crowd. Just like a fingerprint, your voice is unique, and it’s what will make you stand out in the sea of talent.
Embrace Your Vocal Quirks
First things first, forget about trying to imitate someone else’s voice. Your voice is like a fingerprint, remember? So, embrace those quirks and imperfections that make it distinctively yours. Maybe you have a velvety smooth tone, a captivating raspiness, or a knack for delivering humorous lines with perfect timing. Whatever it may be, celebrate your vocal uniqueness and let it shine through in your voice recordings.
Explore Your Vocal Range
Now, let’s talk about vocal range. Just like a versatile actor, a voice-over artist should be able to adapt to various roles and moods. Take some time to explore the different tones and pitches your voice can reach. Can you effortlessly switch between a warm, comforting voice for narrations and a vibrant, energetic voice for commercials? Experiment with different vocal styles and see where your range takes you.
Develop Your Style
Ah, style, the icing on the cake that makes your voice memorable. Think about the kind of projects you want to specialize in. Are you drawn to narrations that evoke emotions and transport listeners to faraway lands? Or do you have a knack for injecting enthusiasm and energy into commercials that make products fly off the shelves? Find your niche and develop your unique style within it. Remember, versatility is key, but having a signature touch can make you truly unforgettable.
To hone your skills, try recording yourself reading different scripts, experimenting with various emotions, tones, and delivery styles. Play with inflections, pacing, and even accents if you’re up for the challenge. Don’t be afraid to make mistakes — this is your laboratory for growth and improvement.
Tip 2: Master the Art of Script Interpretation
Now that you’ve found your unique voice, it’s time to explore into the art of script interpretation. Think of yourself as a storyteller, breathing life into words and immersing your listeners in narratives.
Understand the Message and Target Audience
Before you begin recording, take the time to truly understand the script’s message and the audience it aims to engage. Is it a heartfelt testimonial that requires sincerity and empathy? Or perhaps a lively commercial that needs a burst of energy and excitement? By grasping the intended tone and purpose of the script, you’ll be able to tailor your delivery to match the needs of the project.
Break Down the Script
Next, it’s time to break down the script into smaller, digestible parts. Highlight key phrases, emotional cues, and any specific instructions provided. Pay attention to the flow of the story and identify the natural pauses, climaxes, and transitions. This analysis will serve as your roadmap for delivering a compelling performance.
Inject Life into the Words
Now comes the fun part — bringing the script to life with your voice. As you read through the lines, imagine yourself as the character or narrator in the story. Visualize the scene, the emotions, and the intended impact. Channel that energy and emotion into your delivery, creating an immersive experience for your listeners. Remember, it’s not just about reading the words, it’s about embodying the essence of the script.
Play with Delivery Techniques
Script interpretation gives you the opportunity to play with a variety of delivery techniques. Experiment with different pacing, emphasis on specific words or phrases, and variations in tone to enhance the overall impact of the script. Don’t be afraid to take risks and step outside your comfort zone. Sometimes, it’s those unexpected choices that truly make a voice-over performance memorable.
Practice, Practice, Practice
As with any skill, practice makes perfect. Take the time to practice your script interpretations before hitting that record button. Rehearse the lines, experiment with different approaches, and solicit feedback from trusted friends or mentors. Embrace constructive criticism as an opportunity for growth and refinement.
By mastering the art of script interpretation, you’ll elevate your voice over performances from good to exceptional. You’ll have the power to breathe life into words and transport listeners to a world of imagination and emotion.
Tip 3: Harness the Power of Breathing and Posture
Alright, let’s talk about two essential elements that can significantly impact your vocal performance: breathing and posture.
Breathe for Vocal Control
Take a deep breath — literally. Proper breathing is the foundation of vocal control and projection. Start by becoming aware of your breathing patterns. Are you breathing shallowly from your chest, or are you utilizing the power of your diaphragm?
To utilize the full potential of your voice, practice diaphragmatic breathing. Imagine filling your lungs from the bottom up, allowing your abdomen to expand as you inhale deeply. This technique provides more air and support for your voice, resulting in better projection, clarity, and overall vocal control.
Posture: Stand Tall, Perform Tall
Now, let’s straighten up and focus on your posture. Your posture not only affects your physical appearance but also influences your vocal performance. Stand tall, my friend, with your shoulders relaxed and your spine aligned. Avoid slouching or slumping, as it can restrict your diaphragm and hinder your vocal power.
Maintaining good posture opens up your chest cavity, allowing for unrestricted airflow and resonance. It also helps prevent strain and tension in your neck and shoulders, ensuring a more comfortable recording session.
Warm-up Exercises for Breathing and Posture
To warm up your breathing and posture muscles before recording, here are a few exercises you can try:
- Belly Breaths: Lie on your back and place a hand on your abdomen. Inhale deeply, feeling your belly rise as you fill your lungs with air. Exhale slowly, allowing your abdomen to fall. Repeat this exercise, focusing on expanding your breath capacity.
- Shoulder Rolls: Stand tall and roll your shoulders backward in a circular motion. This helps release tension in your upper body and promotes relaxation.
- Spine Stretch: Sit upright on a chair, feet flat on the ground. Slowly tilt your head forward, rounding your spine, and reach for your toes. Hold for a few seconds, then slowly roll back up, stacking each vertebra until you’re sitting tall again. This exercise helps release tension and promotes a flexible spine.
Incorporating these breathing and posture practices into your daily routine will not only improve your voice-over recordings but also benefit your overall vocal health.
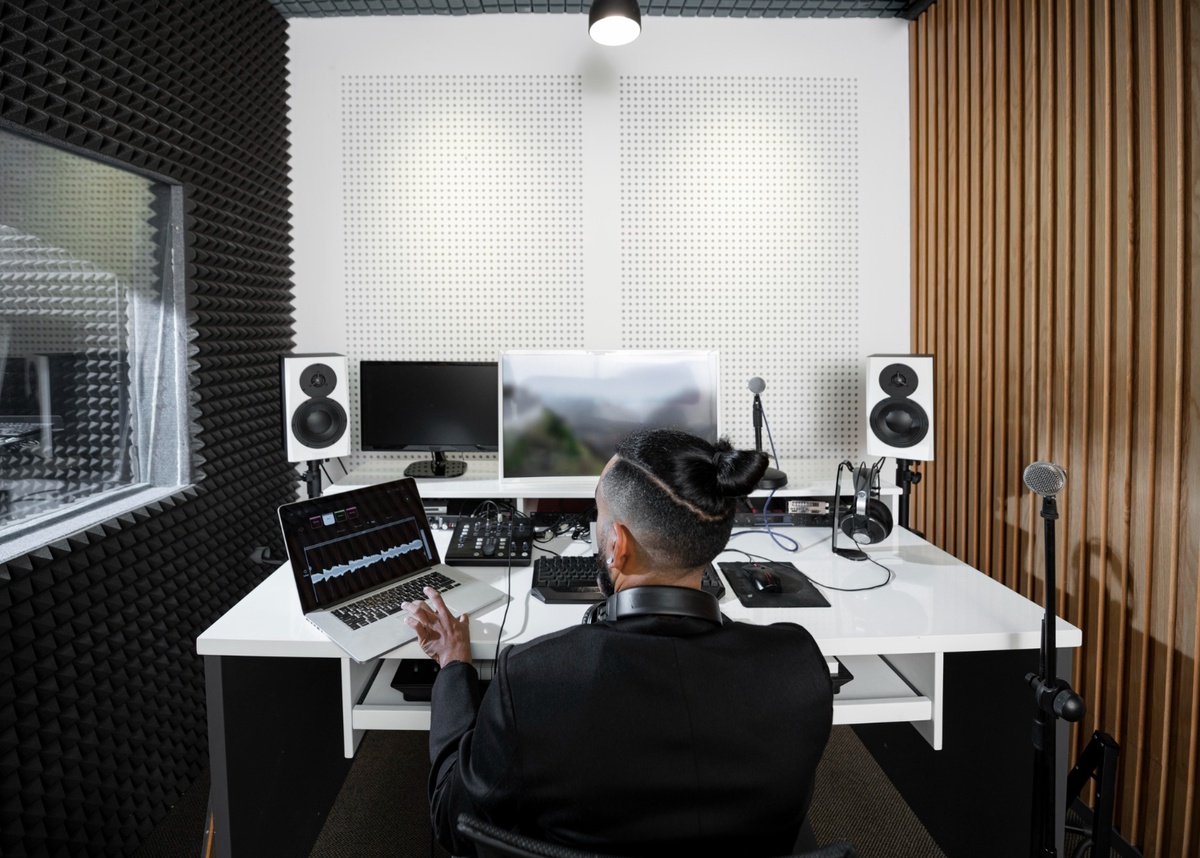
Tip 4: Create a Professional Recording Environment
If you want to achieve top-notch recordings that sound like they were crafted in a high-end studio, it’s time to focus on creating a professional recording environment. Let’s explore the key elements that will take your voice-over game to the next level.
Find the Perfect Recording Space
First and foremost, you need to find a suitable space for recording. Ideally, choose a small, quiet room where external noises can be minimized. Consider using a spare bedroom, a home office, or even a walk-in closet — the goal is to create a space that can be dedicated to recording without interruptions.
Soundproofing Is Your Friend
Soundproofing is the secret sauce that ensures clean and clear recordings. You don’t want external noises creeping into your recordings, ruining all your hard work. To minimize unwanted sounds, consider using acoustic foam panels or soundproofing curtains to absorb echoes and reduce ambient noise. Pay attention to sealing windows, doors, and any other potential sources of noise leakage.
Equipment Essentials
While you don’t need to break the bank on expensive gear, having a few essential items will significantly improve your recordings. Here’s what you’ll need:
- Microphone: Invest in a good-quality condenser microphone that suits your voice and recording needs. Do your research, read reviews, and find one that fits your budget.
- Pop Filter: A pop filter helps eliminate plosive sounds (such as “p” and “b” sounds) that can distort your recordings. It’s a simple yet effective tool for achieving clean and professional audio.
- Headphones: Invest in a pair of closed-back headphones to monitor your recordings accurately and catch any imperfections or background noise.
Optimize the Recording Space: Once you have your equipment ready, it’s time to optimize your recording space. Here are a few tips:
- Positioning: Set up your microphone on a stable surface and adjust its position to capture your voice clearly. Experiment with different microphone placements to find the sweet spot.
- Reflection Filters: If your budget allows, consider using reflection filters or portable vocal booths to further enhance the sound quality. These tools help reduce reflections and improve vocal clarity.
- Eliminate Background Noise: Turn off fans, air conditioners, and any other noisy appliances. Make sure your phone is on silent mode to avoid unexpected interruptions during recording sessions.
Remember, a well-optimized recording environment sets the stage for professional-grade voiceovers. Take the time to fine-tune your setup and create a space that allows your talent to shine.
Tip 5: Polish Your Recording with Editing and Sound Design
Now that you’ve captured your stellar voice-over performance, it’s time to talk about editing and sound design. This is where the magic truly happens and where you’ll transform your raw recordings into polished masterpieces that will captivate your audience.
Choose the Right Editing Software
To kick off your editing journey, you’ll need reliable editing software. There are plenty of options out there, from beginner-friendly tools to industry-standard software. Choose one that suits your needs and budget. Popular choices include Adobe Audition, Audacity, and GarageBand.
Fine-Tune Your Recordings
Once you’ve imported your recordings into your chosen editing software, it’s time to fine-tune them. Here are a few editing techniques to consider:
- Trim and Clean: Trim any unnecessary silence or mistakes to tighten up your recordings. Use the waveform visualization to identify and remove background noise, clicks, or pops.
- Adjust Levels: Ensure your voice is balanced and consistent throughout the recording. Adjust the volume levels to maintain a clear and even sound.
- Smooth Transitions: Smooth out any abrupt transitions or breaths that may disrupt the flow. Use crossfades or gentle fades to create seamless transitions between sections.
Sound design is the icing on the cake that adds depth and richness to your voice-over recordings. Here are some techniques to consider:
- Music and Sound Effects: If appropriate for your project, add background music or sound effects to enhance the overall atmosphere and emotional impact. Choose sounds that complement the tone and message of the script.
- EQ and Compression: Use equalization (EQ) to shape the frequency balance of your voice and make it stand out in the mix. Compression can help even out the dynamics of your voice and give it a polished, professional sound.
- Ambience and Reverb: Add subtle ambience or reverb to create a sense of space and immersion. Be careful not to overdo it, subtlety is key here.
- Final Checks and Exporting
Before you hit that export button, give your edited recording a final listen. Check for any remaining errors, ensure the volume levels are appropriate, and make any necessary adjustments. When you’re satisfied, export your final recording in a high-quality format suitable for your intended use (e.g., WAV or MP3).
Editing and sound design are powerful tools that can elevate your voiceovers to new heights. Take the time to refine your recordings, experiment with different techniques, and let your creativity shine through.
Conclusion
We’ve reached the end of our blog where you should have learnt some techniques, and insider tips that will undoubtedly propel your voice-over career to new heights. Here is a recap of our five essential tips:
- Find Your Unique Voice: Embrace your quirks, explore your vocal range, and develop your own style. Your unique voice is your superpower in the world of voiceovers.
- Master the Art of Script Interpretation: Understand the message, break down the script, inject life into the words, and play with delivery techniques. Become a master storyteller through your voice.
- Use the Power of Breathing and Posture: Breathe from your diaphragm for vocal control, stand tall with good posture, and incorporate warm-up exercises to optimize your vocal performance.
- Create a Professional Recording Environment: Find a suitable space, invest in soundproofing, equip yourself with essential recording gear, and optimize your setup for the best sound quality.
- Polish Your Recording with Editing and Sound Design: Choose the right editing software, fine-tune your recordings, enhance with sound design techniques, and give your voiceovers that professional touch.
Now, you talented audio recorders, it’s time for the final call to action. Are you ready to take your voice-over skills to the next level? Remember, practice makes perfect, so keep honing your craft, experimenting with different styles, and seeking opportunities to showcase your talent. Join voice-over communities, network with industry professionals, and never stop learning and growing.
And when you’re ready to take on bigger projects or need professional assistance, don’t forget to reach out to reputable sound design companies. They can offer expertise, guidance, and collaboration opportunities to help you refine your skills and take your voice-over career to the next level. visit us today at https://rianhunter.com/
Thank you for reading, keep dreaming big, voicing with passion, and embracing the “Secrets of the Sound Booth.” Your voice over success awaits.

No comments yet