Introduction
Solar panels are a renewable energy solution that has gained significant popularity due to their ability to harness the power of the sun and convert it into clean electricity. Installing solar panels on your property can not only reduce your electricity bills but also contribute to a more sustainable future by reducing carbon emissions. In this step-by-step guide, we will walk you through the installation process for solar panels to generate electricity.
Step 1: Assessment and Planning
The first step in the installation process is assessing your property and planning the solar panel system. This involves the following key considerations:
Roof Inspection: Examine your roof's condition to ensure it is structurally sound and can support the weight of solar panels. Make any necessary repairs or replacements.
Location and Orientation: Determine the optimal location on your roof for solar panel installation. The orientation should be south-facing in the Northern Hemisphere and north-facing in the Southern Hemisphere to capture the most sunlight.
Shading Analysis: Identify any potential shading sources, such as trees, neighboring buildings, or obstructions that may block sunlight. Minimizing shading is crucial for maximizing energy production.
Energy Needs: Assess your current and future electricity needs to determine the size of the solar panel system required to meet your energy consumption.
Budget: Establish a budget for the installation, including the cost of solar panels, inverters, mounting hardware, and installation services.
Step 2: Solar Panel Selection
Once you have a clear understanding of your energy needs and budget, it's time to choose the solar panels that will best meet your requirements. Consider the following factors when selecting solar panels:
Solar Panel Type: There are different types of solar panels available, such as monocrystalline, polycrystalline, and thin-film. Each type has its own efficiency and cost characteristics.
Efficiency: Higher-efficiency panels generate more electricity in limited space, but they may be more expensive. Consider your available roof space and budget when choosing the level of efficiency.
Warranty: Review the warranty offered by the manufacturer. Most solar panels come with a warranty of 25 years or more, providing long-term protection for your investment.
Aesthetics: Solar panels come in various sizes and designs. Choose panels that match your property's aesthetics if visual appeal is a concern.
Step 3: Obtaining Permits and Approvals
Before starting the installation, you'll need to obtain the necessary permits and approvals. This process may vary depending on your location and local regulations, but typically involves the following steps:
Contact Local Authorities: Reach out to your local permitting office or building department to inquire about the permits required for solar panel installation.
Submit Documentation: Prepare and submit the necessary documents, which may include your installation plans, specifications, and any required fees.
Inspections: Your local authorities may conduct inspections during or after installation to ensure compliance with building and safety codes.
Step 4: Procuring Components and Equipment
With the necessary permits in hand, it's time to procure the components and equipment required for your solar panel system. The key components include:
Solar Panels: Purchase the solar panels you selected during the planning phase.
Inverters: Inverters convert the direct current (DC) electricity generated by the solar panels into alternating current (AC) electricity that can be used in your home. There are different types of inverters, including string inverters, microinverters, and power optimizers.
Mounting Hardware: Mounting hardware, such as racking systems or roof mounts, secures the solar panels to your roof or the ground.
Wiring and Connectors: Acquire the necessary wiring, connectors, and junction boxes to connect the solar panels to the inverter and your electrical system.
Monitoring System: Consider installing a monitoring system that allows you to track the performance of your solar panel system and energy production.
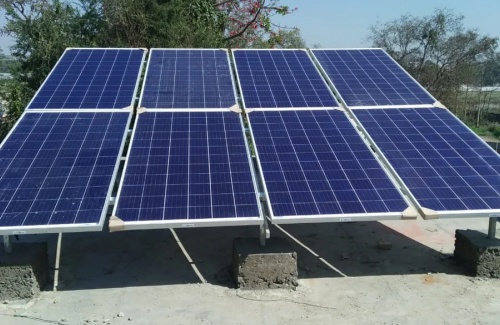
Step 5: Installation
The installation phase involves physically mounting the solar panels on your property. Depending on your location and roof type, the installation process may vary, but it generally includes the following steps:
Roof Preparation: Clean the roof and make any necessary repairs to ensure it is in good condition for solar panel installation.
Mounting Hardware Installation: Secure the mounting hardware to your roof or the ground. This will serve as the framework for your solar panels.
Solar Panel Installation: Attach the solar panels to the mounting hardware, ensuring they are positioned at the optimal angle and orientation.
Inverter Installation: Install the inverter near your electrical service panel and connect it to the solar panels.
Electrical Wiring: Connect the wiring from the solar panels to the inverter, and then from the inverter to your electrical system. This step should be performed by a licensed electrician to ensure safety and compliance with electrical codes.
Grounding: Properly ground the solar panel system to minimize the risk of electrical issues and ensure safety.
Step 6: System Testing and Commissioning
After the physical installation is complete, the system needs to be thoroughly tested and commissioned to ensure it functions as intended:
Testing: Verify that the solar panels, inverter, and electrical connections are working properly. Ensure there are no issues with wiring or components.
Inspection: An inspector may visit your property to assess the installation and confirm that it meets safety and quality standards.
Monitoring: Set up your monitoring system to track the performance of your solar panel system. This will help you ensure it's generating the expected amount of electricity.
Step 7: Connecting to the Grid
If your solar panel system is grid-connected, you'll need to coordinate with your utility company to establish a connection to the grid. This is essential to ensure that any excess electricity your system generates can be sent back to the grid for credits or compensation. The steps involved in connecting to the grid may include:
Application: Submit an application to your utility company to connect your solar panel system to the grid.
Inspection: The utility company may inspect your system to ensure it meets safety and interconnection requirements.
Agreement: Sign a net metering or feed-in tariff agreement with your utility company to define how excess electricity will be credited or compensated.
Grid Connection: Once approved, your solar panel system will be connected to the grid.
Step 8: Solar Panel Maintenance
Regular maintenance is essential to ensure the long-term performance and durability of your solar panel system. Some key maintenance tasks include:
Cleaning: Periodically clean the solar panels to remove dirt and debris that can reduce their efficiency.
Inspections: Conduct routine inspections to check for any damage, loose connections, or other issues that may affect performance.
Monitoring: Continuously monitor the system's performance using the monitoring system to detect any irregularities.
Snow and Debris Removal: In areas with heavy snowfall or debris, take steps to remove obstructions that may block sunlight from reaching the panels.
Professional Maintenance: Consider hiring a professional solar maintenance service to perform in-depth inspections and maintenance, especially for complex systems.
Conclusion
Installing solar panels to generate electricity is an environmentally friendly and cost-effective way to power your home or business. By following the step-by-step installation process outlined in this guide, you can take advantage of the many benefits of solar energy, including reduced energy bills, a lower carbon footprint, and increased energy independence. Proper planning, component selection, and maintenance will ensure

No comments yet