Curtains are not just functional window coverings; they also play a crucial role in enhancing the aesthetics of a room and creating a sense of coziness and privacy.
Properly installing Curtain Rods and Brackets is a key step in ensuring that your curtains hang securely and look their best.
Whether you're a seasoned DIY enthusiast or a beginner, this comprehensive guide will take you through the process of installing Stainless steel curtain brackets with precision and confidence.
Gather Your Tools and Materials
Before you begin the installation process, it is essential to have the necessary tools and materials at hand. Here's what you'll need:
- Measuring tape
- Level
- Pencil
- Power drill
- Drill bits (appropriate size for your wall anchors)
- Wall anchors (if necessary)
- Screws (usually provided with the curtain brackets)
- Screwdriver or power drill with screwdriver attachment
- Stainless steel curtain brackets
- Curtain rod
- Curtain panels or fabric
Measure and Mark
Start by measuring the width of your window frame or the area where you want to hang the curtains. This measurement will help you determine the appropriate width for your Curtain Rods and Brackets. Next, decide on the height at which you want to install the brackets.
The height will depend on factors such as the curtain style, the length of the curtains, and your personal preference.
Use a measuring tape and a pencil to mark desired height for the brackets. Make sure to measure and mark both ends of the window frame for accuracy.
Determine Bracket Placement
For single Stainless steel curtain brackets, position the center of each bracket over the marks you made in the previous step. If you're installing double brackets for layered curtains, make sure the center of each bracket aligns with the mark, and the brackets are equidistant from the center mark.
Use a level to ensure that the brackets are perfectly aligned and level. This step is crucial to ensure that your curtains hang straight and appear well-balanced.
Pre-Drill Holes
Using a power drill with the appropriate drill bit, pre-drill holes for the screws. The size of the drill bit should match the size of the wall anchors you'll be using. If your walls are made of drywall or plaster, it's recommended to use wall anchors to provide additional support for the brackets.
Insert the wall anchors into the pre-drilled holes. Gently tap them in with a hammer if needed, ensuring they are flush with the wall surface.
Attach Brackets
Hold the bracket against the wall, aligning it with the pre-drilled holes and wall anchors. Insert the screws through the bracket's screw holes and into the wall anchors or directly into the pre-drilled holes.
Using a screwdriver or a power drill with a screwdriver attachment, tighten the screws securely. Be careful not to over-tighten, as it could strip the screw holes or damage the wall.
Level Check
Once the brackets are securely attached to the wall, use a level again to double-check their alignment. Adjust the brackets as necessary to ensure they are perfectly level. This step is crucial for ensuring that your curtains hang straight and create a balanced appearance.
Install Curtain Rods
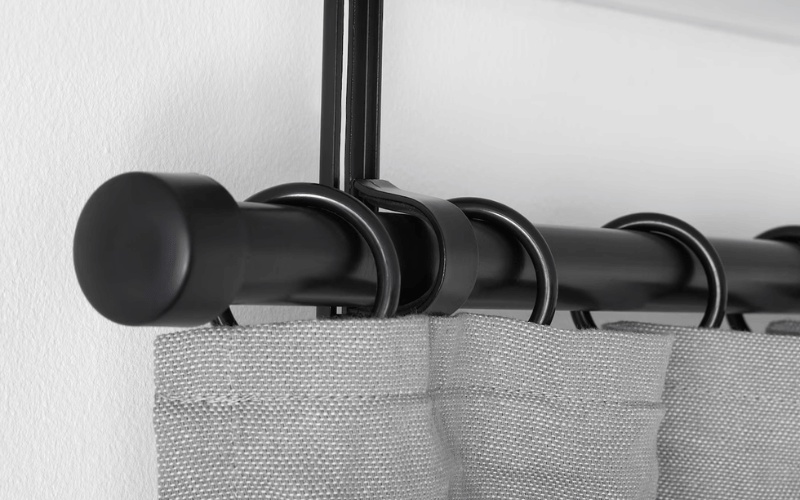
With the brackets securely in place, you can proceed to install the curtain rods. Slide the curtain rings onto the rod, and then insert the rod through the openings in the brackets.
Some Curtain Rods and Brackets come with set screws that you can tighten to secure the rod in place. Others might have decorative finials that you attach after inserting the rod.
Hang Your Curtains
With the curtain rods in place, you're ready to hang your curtains. Slide the curtain panels onto the rings or hooks on the rod. Adjust the position of the curtains to achieve the desired look and ensure they're hanging evenly.
Stand back and admire your beautifully hung curtains, knowing that they're securely supported by your professionally installed Stainless steel curtain brackets.
Pro Tips for a Successful Installation
- Double-Check Measurements: Measure twice before making any holes in the wall to ensure accuracy. Mistakes can be difficult to rectify once the brackets are in place.
- Use a Template: To ensure accurate bracket placement, create a template out of paper or cardboard that matches the size of your brackets. Use this template to mark the placement of the brackets on the wall.
- Have a Helper: Enlist a friend or family member to assist you in holding the brackets steady while you secure them in place. This is especially important for longer curtain rods.
- Test Opening and Closing: Before finalizing the installation, test opening and closing the curtains to ensure they move smoothly and hang properly without brushing against the wall.
Conclusion
Installing Curtain Rods and Brackets is a fundamental step in achieving a polished and cohesive window treatment. By following this comprehensive step-by-step guide and considering the pro tips provided, you can confidently tackle the installation process and ensure that your curtains hang securely and beautifully.
Properly installed Stainless steel curtain brackets not only enhance the aesthetics of your space but also provide the foundation for functional and visually appealing window coverings.
So, roll up your sleeves, gather your tools, and transform your windows into focal points that reflect your style and attention to detail.
Read More: How to Choose the Right Curtain Brackets for Your Needs

No comments yet