A Step-by-Step Guide on How to Replace a Sink Hole Cover
Introduction on How to replace sink hole cover
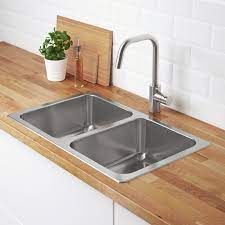
A sink hole cover may seem like a small component of your kitchen or bathroom, but it plays a crucial role in maintaining the aesthetics and functionality of your sink. Over time, sink hole covers can become worn out, damaged, or simply outdated, prompting the need for replacement. Fortunately, replacing a sink hole cover is a relatively straightforward task that can be completed with just a few tools and a little know-how. In this guide, we'll walk you through the step-by-step process of replacing a sink hole cover, ensuring a seamless and professional-looking result.
Step 1: Gather Your Tools and Materials
Before you begin, gather the necessary tools and materials:
New sink hole cover (make sure it matches the size and style of your sink)
Screwdriver (either Phillips or flat-head, depending on the type of screws used)
Plumber's putty (optional, for sealing purposes)
Towel or rag
Step 2: Prepare the Sink Area
Start by clearing out any items around the sink area to give yourself ample space to work. Lay down a towel or rag to protect the sink and countertop from scratches or damage during the replacement process.
Step 3: Remove the Old Sink Hole Cover
Using your screwdriver, carefully loosen and remove the screws holding the old sink hole cover in place. Set the screws aside in a safe place, as you may need them later. Once the screws are removed, gently lift the old sink hole cover out of the sink basin.
Step 4: Clean the Area
With the old sink hole cover removed, take a moment to clean the area around the sink hole thoroughly. Remove any residue or debris left behind from the old cover to ensure a clean surface for the new cover.
Step 5: Install the New Sink Hole Cover
Position the new sink hole cover over the sink hole, ensuring that it aligns properly and sits flush with the sink surface. If desired, you can apply a small amount of plumber's putty to the underside of the new cover to create a watertight seal between the cover and the sink.
Step 6: Secure the New Cover in Place
Once the new sink hole cover is properly aligned, use the screws you removed earlier to secure it in place. Tighten the screws evenly to ensure that the cover is securely fastened without causing any warping or damage to the cover or sink.
Step 7: Test for Leaks
After securing the new sink hole cover, turn on the water and check for any leaks around the edges of the cover. If you applied plumber's putty, this should create a watertight seal, but it's always a good idea to double-check for any potential leaks.
Step 8: Clean Up and Enjoy Your Newly Installed Sink Hole Cover
Once you've confirmed that the new sink hole cover is securely in place and leak-free, clean up any remaining mess or debris around the sink area. Admire your handiwork and enjoy the refreshed look of your sink with its brand-new cover installed.
Conclusion on how to replace sink hole cover
Replacing a sink hole cover is a simple DIY task that can instantly improve the appearance and functionality of your sink. By following the step-by-step guide outlined above and taking care to properly install the new cover, you can achieve professional-looking results without the need for professional assistance. Whether you're upgrading an outdated cover or repairing a damaged one, this guide equips you with the knowledge and skills needed to tackle the task with confidence.

No comments yet