You can upgrade your bathroom faucet yourself. Here's how.
Unless stated otherwise, editorial products are independently selected, but we may receive compensation or affiliate commissions if you buy something through our links. Prices and ratings are accurate at time of publication.
Introduction
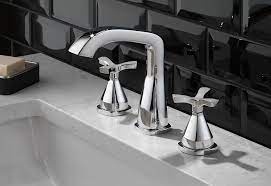
Installing a new industrial bathroom faucet may be just what your bathroom needs. Here are the simple steps to follow.
Tools Required
- Adjustable wrench
- Bucket and towels
- Phillips-head screwdriver
Materials Required
- New faucet
Project step-by-step (8)
Turn Off Water
- Stop the water supply at the faucet or the main water valve for the whole house by shutting off the hot and cold water valves.
Remove Supply Lines
- Drain any water that has accumulated in the faucet.
- Use an adjustable wrench to disconnect the hot- and cold-supply lines at the valves or faucets. Keep a bucket nearby to catch any water that may leak. Also keep a towel on hand.
Remove the Old Faucet
- Most faucets are attached to the sink with a large locknut from under the sink, while others have a threaded rod with a nut that attaches to a mounting plate under the sink. (See photo.)
- You will need to loosen the nuts holding the faucet in place under the sink, and then remove the old faucet by pulling it up and away from the sink.
Prep Before Installation
- Scrub away any dirt and mineral deposits that may have accumulated on the sink surface before installing the new faucet.
- Water supply lines should be attached to the faucet now. Some faucets come with them already attached.
Install Deck Plate
- You may need to purchase a deck plate separately if your faucet doesn't include one. (Not all faucets include a deck plate.)
- Apply a thin bead of plumber's putty to the bottom of the deck plate before installing it.
Install the Faucet
- The supply lines and shank of the faucet should be inserted into the hole in the deck plate or sink.
- Assemble the sink in the following order: 1. Rubber washer, 2. Brass washer, 3. Threaded locknut with set screws. Hand tighten the locknut.
- Make sure the set screws on the locknut are tightened by working your way around the locknut tightening the screws slightly each time.
Connect Water Supply
- Tighten the hot- and cold-water supply lines to the corresponding shut-off valves with an adjustable wrench, but not too tightly.
- If the supply lines are too long, they can be shortened by creating a loop.
Turn On the Water
- You should turn on the hot and cold shut-off valves and check for leaks near the valves.
- Here are expert tips from Family Handyman for shower systems.

No comments yet