A DIY NAS (Network Attached Storage) server is a worthwhile project for home media serving and backups. Building your own system allows customizing the hardware specifications to suit your needs. Follow this comprehensive guide for the key steps, considerations and tips when assembling a home built NAS.
How to Build Your Own NAS Server
Building your own NAS (Network Attached Storage) server using standard PC components can be an affordable way to create a DIY centralized storage solution. With the right hardware and software configuration, you can create a flexible and customizable NAS tailored to your storage needs.
Carefully planning the NAS configuration upfront ensures you get the right components for the intended purpose without overspending.
Define usage - File backup/archiving, media storage, surveillance recordings, etc? This drives storage capacity and network performance needs.
Storage capacity - Assess how much space you need today and projected growth. Calculate the total raw capacity required factoring in redundancy.
Performance level - Required network speeds and disk throughput based on concurrent users and activity. 1GbE sufficient for most needs but higher throughput needed for multiple streaming clients.
Form factor - Standard ATX tower, rackmount or small Mini-ITX chassis. Tower is easiest for home builds allowing future expansion.
Operating system - Open source options like FreeNAS and Open Media Vault or Linux distros. Provides NAS management capabilities.
Redundancy level - RAID level based on storage vs fault tolerance needs. RAID 10 provides a good blend for home NAS but RAID 6 better protects large capacities.
Budget - Determine an overall budget for the system covering hardware components, storage drives and software. Expect to spend $500 to $2000+ for a capable DIY NAS.
Advance planning helps build a NAS that aligns with your specific use case, storage needs and budget.
Selecting Hardware Components
Choosing the right foundation of core hardware components ensures reliable and efficient operation.
Motherboard - Pick an ATX board with 6 SATA ports or more to allow connecting multiple drives without a HBA card. Intel or AMD chipset.
CPU - Low power, multi-core CPUs like Intel Core i3 or AMD Ryzen 3 are sufficient. Higher core NAS CPUs help with encryption or app serving needs.
RAM - Minimum 8GB but 16GB better suits ZFS and allows running VMs. ECC RAM recommended for ZFS to prevent data corruption.
PSU - Quality 80+ Gold PSU with sufficient wattage for selected components and number of drives. Modular helps with cable management.
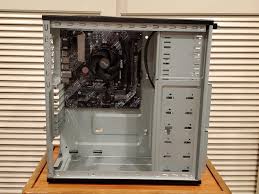
Chassis - Mid tower ATX cases offer adequate drive bays and expansion room. Include quiet cooling fans.
HBA Card - Add a SAS card for connecting more drives if motherboard lacks enough SATA ports. LSI 9200-8i or similar.
NIC - Gigabit ethernet sufficient but add a 10GbE NIC if you have a 10Gb network or need faster throughput. Intel X540-T2 recommended.
Choosing the right foundation avoids bottlenecks and supports expanding the NAS down the road.
Selecting Drives and RAID Level
The physical hard drives Determine capacity, performance and redundancy:
Drive types – WD Red or Seagate IronWolf NAS drives optimized for 24/7 operation and RAID. Or use enterprise drives for higher reliability.
Drive capacity – Higher capacity drives (8TB to 16TB) maximize storage density and are cost effective. Utilize 2.5” SSDs for caching.
Drive count – Start with 4 to 6 drives for adequate capacity and flexibility to expand. Too many drives increases rebuild times and risk.
RAID level - RAID 10 provides a good blend of capacity and redundancy for home NAS. RAID 6 better protects large arrays but lower storage efficiency.
Hot spares - Add one hot spare drive to automatically rebuild failed drives for RAID 5 or 6 arrays.
Choosing the right drives and RAID provides a balance of performance, capacity and fault tolerance needed for reliable data storage.
NAS Operating System Selection
The NAS OS provides the services, protocols and management interfaces.
FreeNAS – Powerful open source NAS OS built on FreeBSD with ZFS. Supports extensive protocols and features. Steeper learning curve.
OpenMediaVault – Linux based NAS OS with web GUI. More lightweight than FreeNAS but fewer advanced capabilities.
UnRAID – Proprietary OS that supports mix of drive sizes without parity overhead. Lower cost but less resilient than RAID.
Linux (Debian, OMV, etc) – Directly running Linux gives more control but requires command line configuration. Advanced option.
Windows Server - Robust file sharing but not purpose built for NAS. Requires licensing cost.
The OS determines available features, ease of management and extent of customization.
NAS Server Configuration
With all the hardware and drives assembled, complete initial configuration:
- Install the selected NAS OS and associated drivers
- Configure network interfaces – DHCP, static or link aggregation
- Create SHR, ZFS or other storage volumes on the drives
- Set mount points for creating shared folders
- Enable SMB and NFS sharing services
- Create user accounts and set file permissions
- Configure server settings like power management
- Check SMART health of all drives andvolumes
- Schedule regular scrubbing to detect data integrity issues
- Enable remote access, alerts and other features as needed
Thoroughly test and validate the system before trusting it with precious data. Burn it in overnight under load.
Data Protection and Backups
Protecting data is paramount for any NAS.
- Configure cloud backups to sync or replicate data offsite automatically
- Enable incremental snapshots for point-in-time restores
- Backup critical data to external drives periodically
- Ensure proper UPS and surge protection
- Replace drives proactively as they near end of life
- Monitor SMART attributes and RAID status
- Test restores to validate backups integrity
A sound backup strategy and monitoring safeguards against data loss scenarios.
Questions About Building a NAS
Here are some common questions around constructing your own NAS:
What are the advantages of a DIY NAS versus a pre-built NAS or DAS?
DIY NAS allows customizing to exact performance needs. DAS is simpler but doesn't enable sharing files over a network. Pre-built NAS is easier to setup but offers less flexibility and expansion compared to DIY builds.
What are recommended operating systems for DIY NAS?
FreeNAS, OpenMediaVault and UnRAID are popular choices purpose built for NAS. Or a standard Linux distro like Ubuntu Server or Debian provide more customization but require command line configuration.
How difficult is configuring network shares on DIY NAS compared to a commercial NAS?
Commercial NAS devices provide web and desktop UIs that simplify setup of network protocols like SMB and NFS. DIY NAS often requires more command line work to configure shares depending on the OS used.
What are the limitations of DIY NAS compared to enterprise NAS?
DIY NAS can't match the performance, scalability and advanced data management features found on enterprise NAS appliances. But DIY meets the needs of most home users at lower cost.
What are the best practices for monitoring and protecting data on DIY NAS?
Schedule regular scrubbing to check data integrity. Backup critical data both locally and offsite. Monitor drive SMART attributes and volume status. Test backups to validate recoverability. Replace aging drives. Use UPS and surge protection.
Conclusion
Building your own NAS server allows creating a fully customized solution tailored exactly for your home media serving and backup needs. By carefully selecting the right hardware components, storage drives, RAID level and operating system, a high performance DIY NAS can be constructed cost effectively. Following best practices for configuring shares, access, backups and data integrity ensures a reliable system for safely storing your irreplaceable data. While requiring more technical skill than buying a pre-built NAS, constructing your own gives you ultimate flexibility and control.

No comments yet