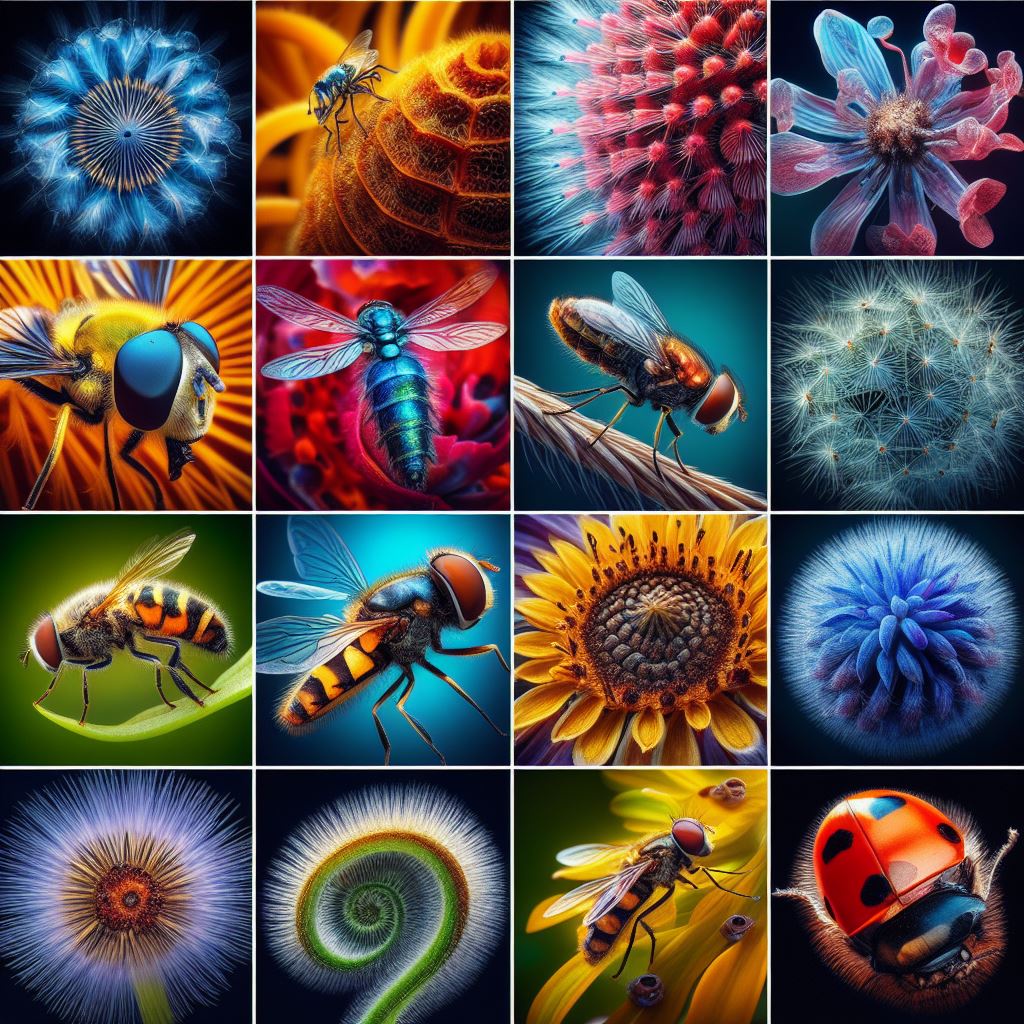
In the intricate and captivating world of macro photography, mastering the art of exposure control is akin to a chef perfecting their signature dish. It's not just about capturing an image; it's about breathing life into the minuscule and often overlooked wonders of our world. Macro photography opens a door to the unseen, bringing the smallest details into stunning focus. But to truly excel, understanding and controlling exposure is paramount.
Exposure Control in Macro Photography
The Role of Aperture in Macro Photography Exposure
Aperture – a term that often echoes through the corridors of photography forums and studios, is the heart of exposure control in macro photography. It's the eye of the camera, controlling the amount of light that reaches the sensor. In the macro realm, where details are king and the depth of field is your kingdom, aperture reigns supreme.
In macro shots, even the slightest change in aperture can have a profound impact. Opt for a wide aperture (a low f-number like f/2.8), and you'll find your subject enveloped in a beautifully blurred background – a shallow depth of field that isolates your subject, making it leap from the frame. But tread carefully; a wide aperture also means a thinner plane of sharpness, a consideration crucial when you're magnifying the microscopic.
On the flip side, a narrow aperture (higher f-numbers like f/16) extends this depth of field. More of your scene falls into focus, from foreground to background, letting you capture more detail. This setting is ideal when you want to showcase the complexity of your subject in its entirety. However, remember, a narrow aperture demands more light. It's a delicate balance, a dance of light and detail that defines the art of macro photography.
Shutter Speed and Its Impact on Macro Photography
Shutter speed – the time for which the shutter is open – is another critical player in the exposure trio. It's the rhythm to the aperture's melody in the symphony of macro photography. The faster the shutter speed, the sharper the freeze frame of your moment in time.
In the macro world, even the slightest movement – be it a trembling leaf or a fluttering insect – gets magnified. Hence, a fast shutter speed is often your ally, freezing those fleeting moments into eternity. A general guideline? Aim for at least 1/250s when dealing with subjects that have a tendency to move, like flowers swaying in a gentle breeze or insects on the move.
But, it's not just about freezing motion. Shutter speed also influences exposure. Faster speeds mean less light hitting your sensor, crucial in bright conditions or when using a wide aperture. Conversely, slower speeds allow more light in, useful in dimmer scenarios but beware of the increased risk of blurring, especially if you're shooting hand-held.
ISO Settings for Macro Photography
ISO – the measure of your camera's sensitivity to light – completes our exposure trifecta. In macro photography, where lighting can be as unpredictable as the subjects themselves, ISO plays a vital role.
Raising the ISO brightens your image, invaluable in low-light conditions or when you're striving for fast shutter speeds without compromising on aperture. However, it comes at a cost – noise. Higher ISOs bring in graininess, a trade-off between brightness and image quality. The key is to find your camera's sweet spot, where you get the brightness you need without degrading the quality of your masterpiece.
Modern cameras have pushed the boundaries of acceptable noise levels at higher ISOs. It's a game-changer in macro photography, allowing more flexibility in adjusting to varying light conditions. But the golden rule remains – use the lowest ISO you can get away with. Start at your camera's base ISO, and only step up when the situation demands it.
Manual vs. Automatic Camera Modes in Macro Photography
Now, let's talk about camera modes. In macro photography, the choice between manual and automatic modes can be as defining as your subject itself.
Aperture Priority is a popular choice among macro photographers. You set the aperture, and the camera adjusts the shutter speed accordingly. It's a fantastic way to control depth of field while the camera handles exposure. However, it may not always be the best choice for fast-moving subjects or in varying light conditions.
Shutter Priority swings the focus to controlling motion. You choose the shutter speed, and the camera selects the aperture. It's ideal for capturing dynamic scenes – a bee in mid-flight or petals dancing in the wind. It ensures that your subject stays sharp, even in motion.
But for those who love to experiment, who crave total control over their photographic canvas, Manual mode is the way to go. It hands you the reins of both aperture and shutter speed, giving you the freedom to create and experiment. It's the mode where your skills and creativity can truly shine, albeit with a steeper learning curve.
Manual Focus for Precision in Macro Photography
In the world of macro, your focus is as vital as your exposure. Here, manual focus trumps autofocus. Autofocus, while a marvel in many genres of photography, often falters in the macro domain. It struggles with the minute, the intricate, and the delicate – the very essence of macro photography.
Switching to manual focus puts you in control. You decide the point of sharpness, crafting your image with precision. It's about aligning your artistic vision with the technical prowess of your lens. Yes, it demands practice, patience, and a steady hand, but the results – those exquisitely sharp images where every detail tells a story – are worth it.
Advanced Techniques for Exposure Control in Macro Photography
Macro photography isn't just about getting close; it's about capturing a world unseen by the naked eye. To elevate your macro shots from good to extraordinary requires a blend of technical skill and creative vision. Here's where advanced techniques come into play.
1. Focus Stacking for Ultimate Sharpness
One of the inherent challenges in macro photography is the extremely shallow depth of field, especially at higher magnifications. Focus stacking is a technique where you take multiple images at different focus points and then blend them together in post-processing. This results in an image with front-to-back sharpness that's impossible to achieve in a single shot. It requires patience and precision, but the outcome is a breathtakingly detailed image that showcases the intricacy of your subject.
2. Effective Use of Flash in Macro Photography
Natural light is unpredictable. To counteract this, many macro photographers rely on artificial lighting, particularly flash. A well-used flash can freeze motion, add sharpness, and reduce noise by allowing lower ISO settings. However, direct flash can be harsh. Using diffusers or bouncing the flash can create a more natural look, preserving the delicate features of your macro subjects. Experiment with off-camera flash setups for dynamic and directional lighting.
3. Balancing ISO, Shutter Speed, and Aperture
In macro photography, the interplay between ISO, shutter speed, and aperture is a delicate balancing act. A perfect combination yields an image that is sharp, well-exposed, and noise-free. For instance, if you're shooting a static subject, you might opt for a lower ISO, a smaller aperture for greater depth of field, and compensate with a slower shutter speed. But remember, each adjustment affects the others, so make changes judiciously.
Gear Recommendations for Enhanced Macro Photography
1. Tripods and Stabilization Tools
Stability is crucial in macro photography. Even the slightest movement can turn a potential masterpiece into a blurry disappointment. A sturdy tripod is a macro photographer's best friend. For added precision, consider using a macro focusing rail. This tool allows you to make fine adjustments to your camera's position without disturbing the setup, crucial for focus stacking and framing minute subjects.
2. Macro Lenses and Extension Tubes
The choice of lens can make or break your macro photography. Macro lenses are specifically designed for close focusing and are essential for capturing fine details. They come in various focal lengths, each offering different perspectives and working distances. For those on a budget, extension tubes are a great alternative. They increase the magnification capabilities of your existing lenses, allowing you to delve into macro photography without the immediate need for a dedicated macro lens.
3. Light Modifiers and Reflectors
Light control is a critical aspect of exposure in macro photography. Light modifiers like diffusers soften the harshness of direct light, while reflectors can fill in shadows, ensuring even lighting on your subject. These tools are particularly useful in outdoor settings where natural light can be unpredictable and direct sunlight too harsh for delicate subjects.
Practical Tips for Mastering Exposure in Macro Photography
1. Experiment with Different Settings
Macro photography is as much an art as it is a science. Don't be afraid to experiment with different settings to see what works best for your subject and conditions. Understanding the theory behind exposure is one thing, but true mastery comes from hands-on practice and experimentation.
2. Understand Your Subject
Whether you are photographing intricate patterns on a leaf or the delicate wings of an insect, understanding your subject is key. Spend time observing how light interacts with your subject. Does it have reflective surfaces? Is it translucent? Tailoring your exposure settings to your subject’s unique characteristics can make a significant difference in the final image.
3. Practice Patience and Persistence
Macro photography often requires a patient and persistent approach. Waiting for the perfect lighting conditions, or for a breeze to calm down, can be the difference between an average shot and an exceptional one. Focus on your process, enjoy the journey, and the results will follow.
Conclusion
As we wrap up this exploration of exposure control in macro photography, remember: each setting – aperture, shutter speed, ISO – is a tool at your disposal. They work in harmony, each affecting the other, each essential to the final image. Mastering their interplay is a journey, one filled with experimentation, learning, and, most importantly, a deeper appreciation of the world through your macro lens.
FAQs on Exposure Control in Macro Photography
1. What is Exposure Control in Macro Photography?
Exposure control in macro photography refers to the process of managing the amount of light that reaches the camera's sensor to create a well-lit and detailed image. It involves adjusting the aperture, shutter speed, and ISO settings to achieve the desired brightness and clarity, especially important in macro photography due to the close-up nature and fine details of the subjects.
2. Why is Aperture so Important in Macro Photography?
Aperture is crucial in macro photography because it directly affects the depth of field, or how much of your image is in focus. A wide aperture (low f-number) results in a shallow depth of field, highlighting the subject by blurring the background, while a narrow aperture (high f-number) keeps more of the scene in focus, useful for detailed shots. Aperture also influences the exposure by controlling the amount of light entering the lens.
3. How Do I Choose the Right Shutter Speed for Macro Shots?
The right shutter speed in macro photography depends on your subject and lighting conditions. For static subjects, slower shutter speeds can be used, especially with a tripod. However, for moving subjects like insects, faster shutter speeds (e.g., 1/250s or faster) are necessary to freeze motion. Shutter speed also helps control the overall exposure, especially in bright or dim lighting conditions.
4. What ISO Setting Should I Use for Macro Photography?
In macro photography, it's best to use the lowest ISO setting possible to avoid noise, which is more noticeable in close-up shots. Start with your camera's base ISO (usually 100 or 200) and only increase it when needed to compensate for low light or to achieve a faster shutter speed.
5. Should I Use Manual or Autofocus for Macro Photography?
Manual focus is generally recommended for macro photography. Due to the shallow depth of field and precise focusing requirements, autofocus may struggle to lock onto the right part of the subject. Manual focus allows for more control and accuracy, especially when dealing with tiny or intricate subjects.
6. How Can I Manage Exposure in Challenging Lighting Conditions?
In challenging lighting conditions, use a combination of camera settings and external tools. Adjust your aperture, shutter speed, and ISO to suit the light available. Use light modifiers like diffusers and reflectors to soften harsh light or add fill light to shadows. In extreme conditions, consider using a flash with a diffuser for consistent lighting.
7. What is Focus Stacking and How Does it Affect Exposure?
Focus stacking involves taking multiple images at different focus points and combining them in post-processing to create a photo with greater depth of field than possible with a single shot. This technique requires consistent exposure across all shots to ensure a seamless final image. It's often used in macro photography to achieve sharpness throughout the subject.
8. Can I Use Natural Light for Macro Photography?
Yes, natural light can be excellent for macro photography, especially for creating soft, diffused lighting. However, it's less controllable than artificial light, so you may need to adjust your camera settings more frequently. Using reflectors can help manage natural light, and shooting during the golden hours (early morning or late afternoon) provides softer, warmer light.
9. What Role Does a Tripod Play in Exposure Control?
A tripod stabilizes your camera, allowing you to use slower shutter speeds without the risk of camera shake. This is particularly useful in low-light conditions where you need to keep the ISO low for quality and the aperture narrowed for depth of field. A tripod is also essential for techniques like focus stacking.
10. Are There Specific Lenses Recommended for Macro Photography?
Macro lenses are specifically designed for close-up photography and are highly recommended for their ability to focus closely and render sharp, detailed images. They come in various focal lengths, with longer lenses offering more working distance between the camera and the subject. Extension tubes and close-up filters are alternatives to macro lenses, although they may not provide the same level of quality.
11. How Does Metering Mode Affect Exposure in Macro Photography?
The metering mode determines how your camera measures light. In macro photography, spot or center-weighted metering is often useful because it focuses on the light around your subject, providing more accurate exposure readings for small, detailed subjects.
12. What is the Best Way to Learn Exposure Control in Macro Photography?
The best way to learn exposure control in macro photography is through practice and experimentation. Start with the basics of aperture, shutter speed, and ISO, and then experiment with different combinations in various lighting conditions. Review your photos, take note of what works and what doesn't, and adjust your approach accordingly.
13. How Important is Post-Processing in Macro Photography?
Post-processing is a crucial step in macro photography. It allows you to fine-tune exposure, adjust contrast and colors, and apply techniques like focus stacking and noise reduction. Good post-processing can significantly enhance the details and overall impact of your macro photos.

No comments yet